
")
Unlock the full potential of your Linux system by using Wine to enjoy classic Windows games without a hitch, bringing your favorite old-school experiences back to life.
If you’re like me and enjoy using Linux but occasionally need to run Windows applications, Wine is a fantastic tool to have in your arsenal. Wine acts as a compatibility layer for Linux, allowing you to run Windows programs as if they were native to your system. In this guide, I’ll walk you through the process of installing Wine on Ubuntu, but the steps should be similar for other Linux distributions as well.
Table of Contents
Prerequisites
Before we dive in, make sure you have the following:
- A user account with sudo or root privileges.
- An Ubuntu system (I’m using Ubuntu 20.04, but other versions will work too).
- Access to the terminal.
Install Wine from the Ubuntu Repository
One of the easiest ways to install Wine is through the default Ubuntu repositories. This method ensures you get a version of Wine that has been tested and optimized for your system.
Step 1: Check Your System Architecture
First, we need to determine whether your system is 32-bit or 64-bit. Open your terminal and type the following command:
lscpu
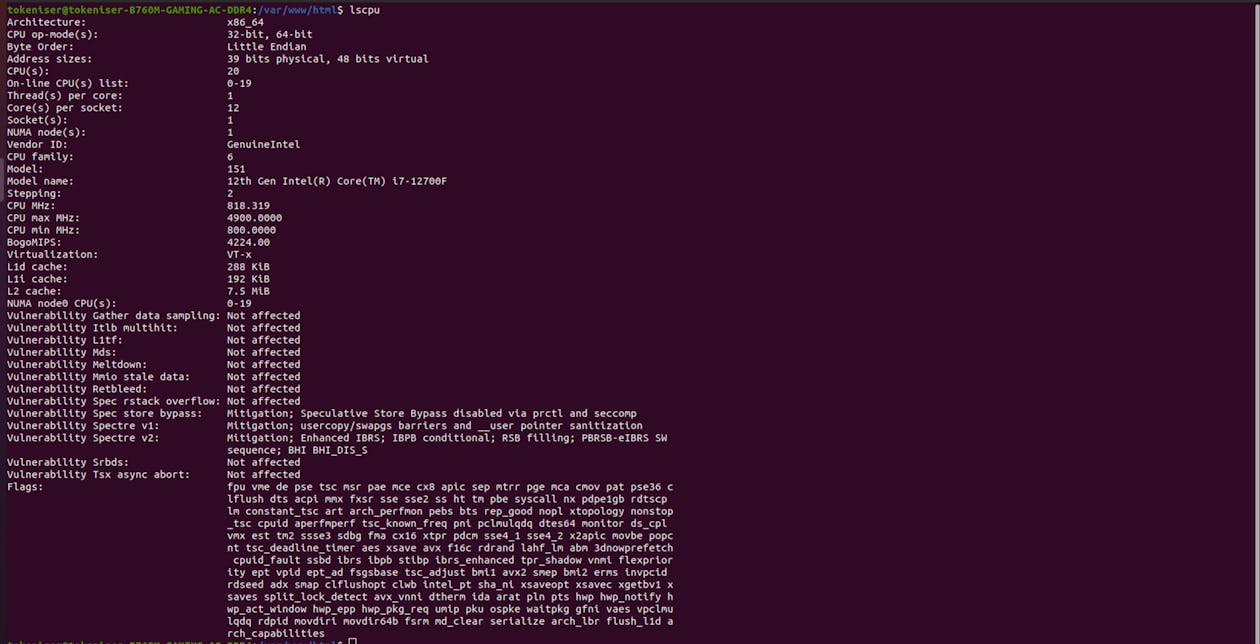
Look for the “CPU op-mode(s)” field in the output:
- If it says “32-bit,” you have a 32-bit system.
- If it says “64-bit,” you have a 64-bit system.
- If it shows both, your system supports both architectures.
In my case, my system supports both 32-bit and 64-bit architectures.
Step 2: Install Wine from the Default Repositories
Now, let’s install Wine. First, update your package list:
sudo apt update

sudo apt install wine64

sudo apt install wine32
Step 3: Verify the Installation
Once the installation is complete, verify it by checking the Wine version:
wine --versionInstall Wine from the WineHQ Repository
If you need the latest version of Wine, you can install it from the WineHQ repository. Here’s how to do it.
Step 1: Enable 32-bit Architecture
Even if you have a 64-bit system, you’ll need to enable 32-bit architecture to run certain 32-bit applications. Enter the following command:
sudo dpkg --add-architecture i386Step 2: Add the GPG Key
Next, add the WineHQ repository’s GPG key to your system to ensure the packages you download are secure:
wget -O - https://dl.winehq.org/wine-builds/winehq.key | sudo apt-key add -
Step 3: Add the WineHQ Repository
Add the repository to your list of sources. Replace “jammy” with your Ubuntu version (e.g., “focal” for Ubuntu 20.04):
sudo add-apt-repository 'deb https://dl.winehq.org/wine-builds/ubuntu/ jammy main'Step 4: Install Wine
Update your package list again:
sudo apt updateTo install the latest stable release of Wine, use:
sudo apt install --install-recommends winehq-stableFor the latest development release, use:
sudo apt install --install-recommends winehq-develStep 5: Verify the Installation
Check the installation by running:
wine --versionUsing the WineHQ repository ensures you get the most recent updates and features.
How to Update Wine
To keep your Wine installation up to date, simply run:
sudo apt upgrade winehq-stableReplace “stable” with “devel” if you have installed the development version. Stable releases come out every 10-12 weeks, while developer updates are more frequent.

Hey, that’s cool ! Can we have a tutorial on gaming with wine . I am really new to linux and completely lost 😔
Glad you liked this ! I will be posting a tutorial on playing old windows games like road rash,pocket tanks , super DX-ball with wine, very soon . Stay tuned 😁
Pingback: Wine Not? Running Windows Games on Linux . Weekend Geeks